Get a Quote
Please Select a Product Technology
Browse Product Category
Science and Sustainability
Can't find the information you need?
Attempting Intelligent Search

Please Select a Product Technology
Browse Product Category
Science and Sustainability
Can't find the information you need?
Attempting Intelligent Search
Please Select a Product Technology
Browse Product Category
Science and Sustainability
Can't find the information you need?
Attempting Intelligent Search
Please Select a Product Technology
Browse Product Category
Science and Sustainability
Can't find the information you need?
Attempting Intelligent Search
Please Select a Product Technology
Browse Product Category
Science and Sustainability
Can't find the information you need?
Attempting Intelligent Search

Sustainability | Innovation
Get a Quote
or call +852 9742 1492
Home >
News >
DIY Honeycomb Christmas Trees
Industry News
DIY Honeycomb Christmas Trees
Learn how to make honeycomb Christmas trees on a budget with Corinne Bradd’s incredible project.
Published by
Harbora Paper at
Friday 11, 2023
Learn how to make honeycomb Christmas trees on a budget with Corinne Bradd’s incredible project.
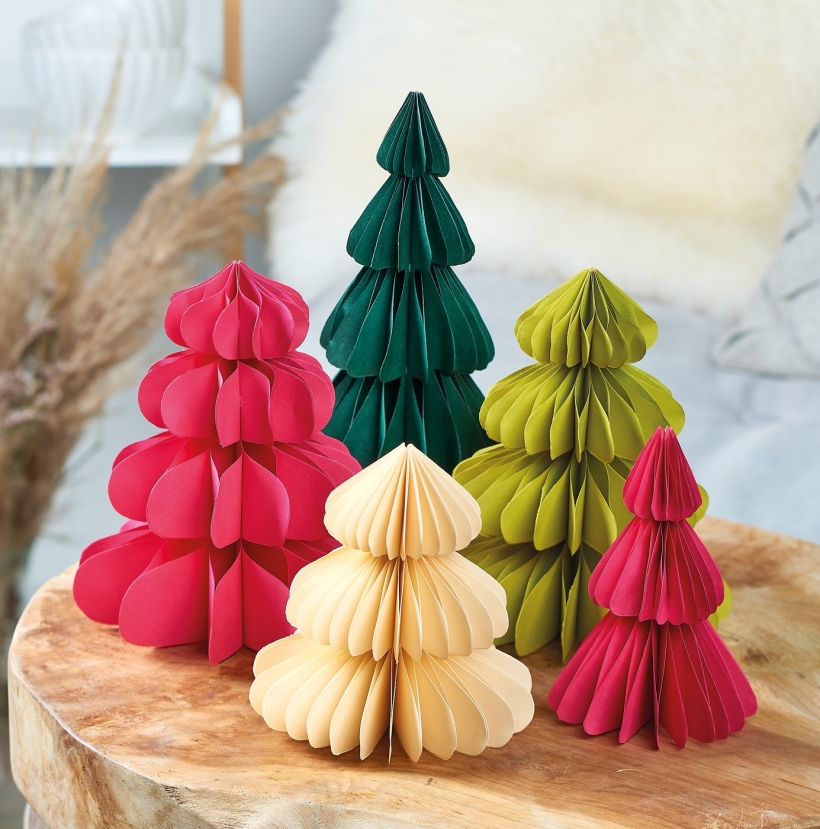
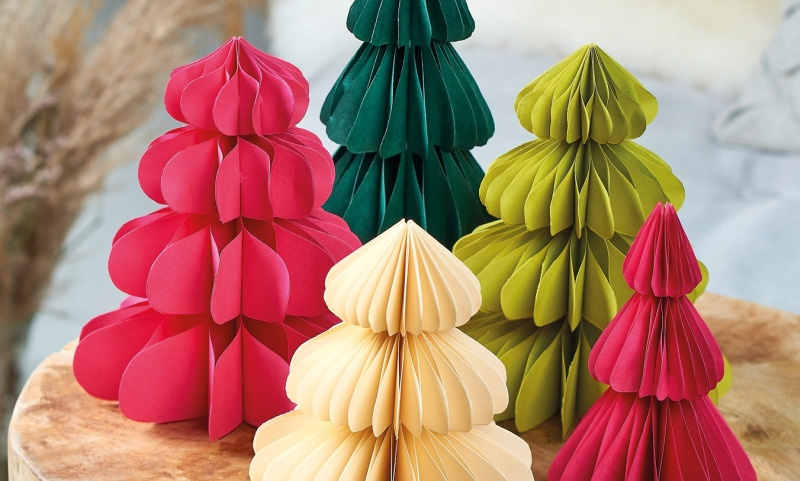
As much as we love decorating our trees each year, we’re getting more and more into giving the rest of our homes a festive glow-up. Trailing garlands up the banister, placing sentimental ornaments on the mantel, creating displays for the coffee table… you get the idea. And these 3D honeycomb trees, beautifully clustered together, are exactly what we have in mind for this year’s festivities. Aren’t they terrific?

2. Open out each fold and dot glue on the inner points of each scallop on one side, before refolding and pressing down on the glue to secure. Stack the glued, folded trees together,
lining up the spines, and clip together before pasting the spine with PVA glue. Allow the adhesive to dry fully before removing the clips.
3. Fan out the trees to ensure they are all held at the spine. Place the tree on a flat surface and flip over the glued pages one by one, adding dots of glue to the tip of each scallop
this time and pressing down to secure. Leave to dry. Cut two half tree shapes from card and glue to the top and bottom of the stack. Carefully open out the stack to reveal the honeycomb-effect tree. Secure at the back with a paperclip slipped over the centre scallops of the card-stiffened paper.

As much as we love decorating our trees each year, we’re getting more and more into giving the rest of our homes a festive glow-up. Trailing garlands up the banister, placing sentimental ornaments on the mantel, creating displays for the coffee table… you get the idea. And these 3D honeycomb trees, beautifully clustered together, are exactly what we have in mind for this year’s festivities. Aren’t they terrific?
YOU WILL NEED:
- Templates
- Coloured paper
- Coloured card
- Paperclips
- Fine point PVA glue applicator
- Sharp scissors
METHOD:
1. Fold coloured paper in half and draw your chosen tree template and size onto it, lining the fold of the template up with the fold on the paper. Fold two other pieces of paper in the same way and stack underneath, securing in place on the fold with paperclips. Use sharp scissors to cut around the template through all the layers. Repeat this several times until you have at least 15 folded trees.2. Open out each fold and dot glue on the inner points of each scallop on one side, before refolding and pressing down on the glue to secure. Stack the glued, folded trees together,
lining up the spines, and clip together before pasting the spine with PVA glue. Allow the adhesive to dry fully before removing the clips.
3. Fan out the trees to ensure they are all held at the spine. Place the tree on a flat surface and flip over the glued pages one by one, adding dots of glue to the tip of each scallop
this time and pressing down to secure. Leave to dry. Cut two half tree shapes from card and glue to the top and bottom of the stack. Carefully open out the stack to reveal the honeycomb-effect tree. Secure at the back with a paperclip slipped over the centre scallops of the card-stiffened paper.
TOP TIPS:
- Save paper by measuring the width of your chosen tree and folding an A4 sheet accordingly. Once your first trees are cut out, the paper can be folded again and the template flipped over to utilise the waste effectively
- Go tonal with various shades of green or choose a unique colour combo
- Don’t try cutting more than three sets of folded paper at once; the cuts will become ragged and the finished result will be disappointing
- Adding more folded trees to your stack will make the finished piece plumper – any less than 15 folded trees will make your tree impossible to open fully without tearing the glued pieces too
Table of Contents
{{ item.label }}
News Category
News Update


Recommended News

Related News
Published by
Harbora Paper at
Monday 14, 2023
Rising to challenges, Harbora Paper laid out a new track for sustainable development
2543 viewers
Published by
Harbora Paper at
Friday 18, 2023
An Indiana company is about to up its paper straw production by 700 percent
1268 viewers
Published by
Harbora Paper at
Friday 18, 2023
McDonald's Really Getting Rid of Plastics Straws?
1210 viewers
Published by
Harbora Paper at
Friday 18, 2023
What is the solution to plastic pollution?
1213 viewers

Published by
Harbora Paper at
Friday 18, 2023
Be cautious! Don't get cheated by the "pseudo-degradation"
756 viewers
Published by
Harbora Paper at
Friday 18, 2023
For Green Life, HarboraPaper Always Makes Effort
1352 viewers

Published by
Harborapaper at
Sunday 01, 2021
Streamlining Creativity: The Era of Mass Production in Paper Decoration Manufacturing
47 viewers

Published by
Harborapaper at
Thursday 01, 1970
Navigating the Landscape: Understanding Competition in the Paper Decoration Production Market
28 viewers
Published by
Harborapaper at
Thursday 01, 1970
The Synergy Between Production and Marketing in Paper Decorations
25 viewers

Published by
Harborapaper at
Thursday 01, 1970
Crafting Success: The Synergy Between Production and Marketing in Paper Decorations
27 viewers
Get The Personalized Solution
A complete solution for your paper product manufacturing is available now!
Yours is the most important voice. If you have any questions or comments for us, please use the form below to send them to us. Thanks!